Showing posts with label flower cane. Show all posts

Monday, 9 August 2010

Trying the scrap flower bead idea

Scrap flower beads

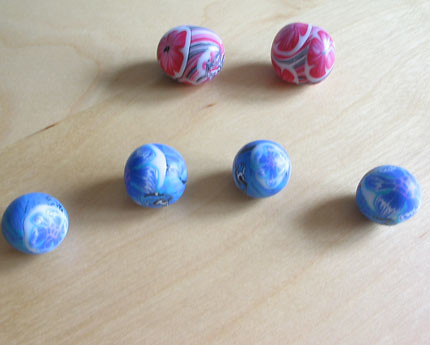
So following on from that flower bead idea yesterday, I decided to give it a go last night. I followed the process from memory because I hadn't printed off the instructions, but it wasn't that complicated. First I conditioned the old Natasha bead clay I had left sitting in my plastic box and marbled it so that I had a log of mainly red, black and white clay. I decided on the safe side to stick to this colour scheme and so I chose to use my orchid flower cane to experiment with.

The first task is to put thin slices of the flower cane onto the log in a random pattern. I admit that having more than one flower cane in different sizes would have helped but I was just experimenting. The log had a diameter of about 1cm. I then cut pieces from the log using a ruler to ensure they were the same size.

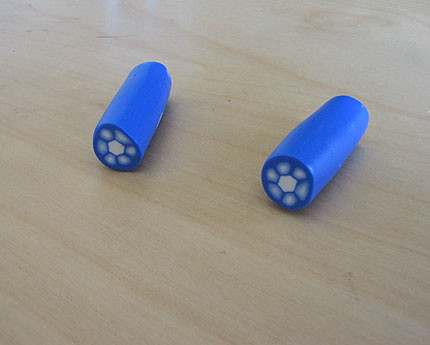
I tried initially to make round beads (this is my comfort zone) by squeezing the ends of the logs together to try to wrap the outside over the inside and then rolled in my hands to get the bead shape. This worked quite well and is fairly easy to do. I then tried making square shaped beads by again squeezing the ends of the logs together and pinching the corners. These didn't seem to turn out so well and I ended up leaving them as scrap. I repeated the round bead process using a blue marble log and my blue flower cane.

What I am left with is some beads which I'm partly happy with and partly not. What ruined it for me personally is that some of the inside pattern from the log remained outside during the rolling. Perhaps I should have pinched the ends a bit better. Also by making the beads round the slices that had been cut in half during the slicing of the log looked odd on the final beads, making me think it is probably better just to add the slices after. For that reason I think this is definitely a technique for square beads not round. On a positive note, it shows how effective it is to add slices to beads and have an interesting background on the base bead other than, for example, white. I also think that choice of colour is important to ensure variation between background and bead slice.

Friday, 6 August 2010

Idea for covering beads

As I've already mentioned, my latest problem has been deciding how to get the cane designs onto the finished beads. Aside from this I still have a lot of scrap clay and that in itself has been troubling me. Am I merely wasting all this clay and not producing anything to be proud of?

So a revelation came to me while having a surf on the internet, when I found Ponsawan Sila's blog post about making square flower beads and I couldn't quite believe what a great idea it was. It basically involves using scrap clay and marbling it. (Great, this I can handle!) Form a long log with the scrap clay. Then use your flower cane slices and place them on the log and slice into equal pieces. Then shape the sliced logs into square beads.

I was stunned by how something so simple can create something so effective and professional. I am so glad I found because it has raised renewed inspiration and that is definitely most needed.

The blog post includes a slideshow which is very handy too.

Thursday, 22 July 2010

Flower beads

Blue flower beads

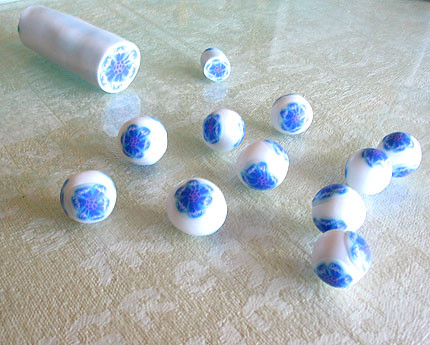
Yesterday I had the whole day to myself (how lovely!) and decided to make good use of the time to do some clay work. So with the aim of actually creating a complete bracelet, I decided to use the flower cane I have already made to make some beads. This part of the process is fairly easy. Cut some small pieces of transparent clay for the base bead and then roll in the palms of your hands to make a simple round bead. I made about 10 beads. I then sliced a short piece out of my flower cane and used that to reduce to a smaller size. I do this by squeezing lightly round and round the cane to make it smaller.

After the reduction I started slicing the end off the cane as thinly as I could, although to be honest, sometimes I think it could have been a lot finer. I had to be fairly careful about this because at times I still get some drag, which flattens the flower, but by some gentle squeezing back into shape this wasn't too problematic. On each bead I placed three slices of cane roughly a third way round the bead. This gives a nice even distribution and also leaves some gaps for poking the hole through. I am still using the cocktail sticks for poking the holes.

Here comes my unexpected pleasure of seeing the final beads, followed closely by mild disappointment. Seeing my final beads I was astonished how good they looked for something fairly simple. And I felt a certain pride in what I had achieved. That was until after I retrieved them from the oven. When they were finally baked the transparent clay obviously is no longer white, but at the same time not transparent either. In fact they came out with a slightly yellowish tinge. I have read that clay can go yellow in the oven, but I have never seen it so far until now. I think the real problem is with the transparent clay and I am starting to think that I should have used plain white. In fact I may redo this whole exercise in white to compare.

I did manage to finally string the beads on the elastic cord that my friend gave me, but 10 beads are certainly not enough to go around my wrist. So I am now waiting for a bulk of beads to arrive in the post which should supplement the bracelet and make it more attractive.

Thursday, 15 July 2010

My first flower cane

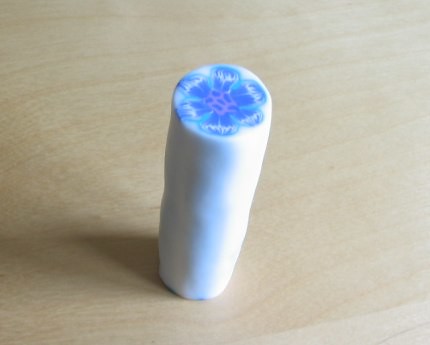
Blue flower cane

I count this as my first real flower cane (even though I managed to make the petal cane earlier and also tried to make the rather unsuccessful orchid cane of my own design).

This lesson grabbed my eye while I was surfing around Flickr looking at the wonderful creations posted on one of the Polymer clay groups. To be honest I'm not sure that looking at other people's work is a good idea or not, as it can make me feel equally inspired or despondent depending on my mood.

Unexpectedly I discovered one woman's photostream which included tutorials in the form of pictures. This is a nice way to follow the tutorial because it is simple and makes it look strangely easy. I decided to try this Blue flower cane tutorial.

With my lovely new packs of clay I decided to recreate the flower cane, choosing brilliant blue, white and a lilac mix I have left over. Making the skinner blend has become quite easy, although I still managed to mess it up a little bit and had to press it back into an equal layer for rolling. I now use my pasta machine for this as it does make life easier. This skinner blend had a double gradient ie with blue on the edges of the strip and white in the middle, which you then roll up into a cane. I feel pretty confident now making the petal design, it's such a great way to make the veining of the petals.

This time I took more care in constructing the flower, but the bit that I didn't take so much care with was the centre of the flower which is supposed to be made out of a simple lace cane. For the centre I chose the lilac and more blue, but the pattern didn't really turn out very well, and in fact I think it is too large for the flower. So next time I will take more care with this.

I finally padded the flower out in transparent clay and then reduced. The reduction caused some minor distortion around the edges of the petals, and I think next time I will remedy this by adding more layers of transparent around the edge of the cane. Generally though I am happy with this first attempt at a flower cane.

Wednesday, 23 June 2010

Flowers to hearts

Heart experiment

After my mild disappointment with the Natasha beads, I decided to go back to creating a basic flower cane. To do this I used the same technique as before to create the petal cane which I had been so impressed with and constructed it around a very basic black and white lace cane for the centre of the flower. (I just built it using a few black and white bullseye canes squashed together).

I've been trying to use what colour clay I have left over before I use new packs, so black and white wouldn't have been my first choice here, but it's all I could think of at the time. The construction went quite well, but as usual I hadn't made enough skinner blend rolls so when I constructed the flower cane the depth just wasn't there and the reduction resulted in a rather distorted flower. Again, not overwhelmed by my final piece.

So, feeling very cheesed off, I started messing around with the remaining bits of clay and came up with the bright idea of experimenting with the transparent clay I would have used for wrapping the flower cane with. Up to this point I have never worked with or baked anything with transparent clay in it. I have seen a lot of pieces of jewellery which use transparent clay to make the most fabulous beads, and I've been looking forward to trying it myself.

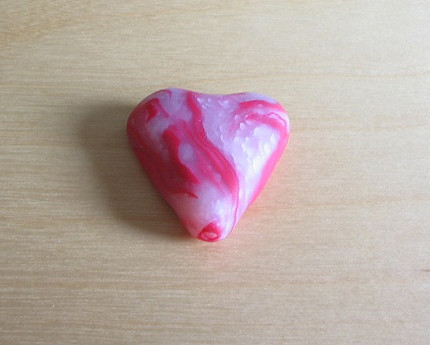
So with a bit of cherry red and some transparent white I marbled and shaped the clay into a heart, poked a hole through it and baked it with the aim to create a simple pendant. I wasn't really bothered too much about the shape, as the most important aspect was to see what the transparent clay would look like after the baking process.

The above photo is the baked bead. I have mixed feelings about it because I see that there are flecks or bubbles under the surface and I'm not sure if that is the usual result, or if I have messed it up in the marbling, or if I accidentally included some white clay in there. The other thing I dislike is the colour change to the cherry red clay which has gone a little pink. I actually preferred the colour combination before it was baked. The final piece doesn't look that impressive, but it probably needs to be polished so I might try this and see if it improves.

Thursday, 3 June 2010

Orchid experiment

Orchid cane

Taking the petal idea further, I was really driven by the idea of making something of my own design. The basic ingredients were there, I had already crafted the petal cane (see my last post) but just slicing these off and placing them onto the base bead to form a vaguely flower shape just didn't seem enough. I was on a roll and didn't want to stop. So with petal cane still intact I decided to experiment further.

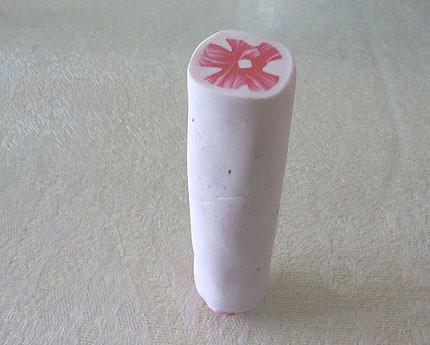
My inspiration was a pink orchid, which sits in my lounge, and has surprisingly flowered after a couple of years of lifelessness. Taking the petal cane I started building my orchid cane by attempting to mould the shape of the petals into the orchid petal shape, cutting the cane in half and combining to form a vaguely cane like shape around a small white core. Adding some tiny rolls of white clay in between the petal canes helps plugs the gaps. Then I trimmed the ends off so that all pieces were the same length. The final part of the process was to wrap the cane in a layer of white clay to keep it together. After some further rolling and reducing, you can see how it turned out.

Well, OK it's not how I imagined it, but at the same time, it's not a complete disaster. But seeing how this was built taught me a few things about caning. Firstly, the design wasn't properly defined. I kind of rushed into it, and built it on a wing and a prayer. So the point is that I didn't plan it very well to start with. I only had the petal canes I started with in the last post, and a few bits left over. As a result the cane wasn't nearly large enough to define the design and I should really have used more colours and layers to better define the borders between the petals, because it resulted in much of the colour being merged in the reduction process. Also the petals have sort of lost their shape at the ends and this is down to the layer of white clay around the edges. For one, the layer of white clay was too thick.

On the positive side you can still see the veining in the petals, but I think I will spend more time learning the basics of creating different pictures within canes before I move on further.

Friday, 28 May 2010

Tackling the skinner blend with a rolling pin

Blue skinner cane

Considering that the last time I tried the skinner blend using the pasta machine the sheet of clay ended up in bits, I decided to try a more controlled method using the rolling pin. For this I chose a very strong blue clay and white clay for the blend. Following the instructions I found on the internet I rolled out two very small sheets of each colour, cut them into rectangles of exactly the same size, and then cut a diagonal across each sheet using the tissue blade.

It's been a while since I took the time to do any crafting, and unfortunately the clay I have stored in plastic boxes is not as fresh as it once was. In fact, it is now a little crumbly. This means it's quite difficult to condition with the fingers and cracks when folded, and makes the process considerably more difficult! Unfortunately this is all I have at the moment, so I had to persevere. With some rolling and squeezing, the clay begins to get more workable, but I am sure using older clay like this is best avoided.

After placing two rectangles of each colour and softly pushing them together to form the sheet to be blended, I used the rolling pin this time rather than the pasta machine. It's interesting that although rolling by hand is much harder work, I found it easier to control the sheet. It wasn't quite as easy as I had seen on the YouTube clip, but I was certainly able to maintain the size and shape of the sheet during the rolling and folding process. I didn't count how many times I folded, but it certainly wasn't anywhere near 30 times!

Despite this, the sheet was a success. I was able to roll a small cane from it, starting from the white end of the sheet and rolling to the blue, finishing with a completed cane with the white gradient at the core. And then I became really ambitious and decided to create a basic flower cane by cutting the cane into sections and combining around a white core. The cane isn't anywhere near large enough to make it worthwhile, but this is only my first effort, and I would definitely take the time to make a much larger and more intricate design next time. You can just about see the skinner blend in the outside 'petals' of the flower design.