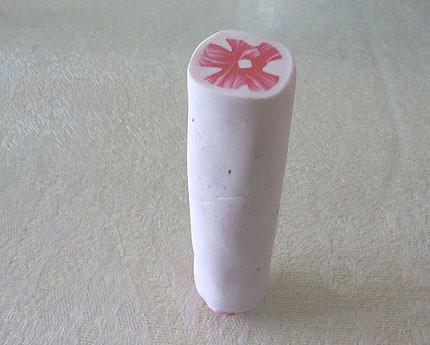
Taking the petal idea further, I was really driven by the idea of making something of my own design. The basic ingredients were there, I had already crafted the petal cane (see my last post) but just slicing these off and placing them onto the base bead to form a vaguely flower shape just didn't seem enough. I was on a roll and didn't want to stop. So with petal cane still intact I decided to experiment further.
My inspiration was a pink orchid, which sits in my lounge, and has surprisingly flowered after a couple of years of lifelessness. Taking the petal cane I started building my orchid cane by attempting to mould the shape of the petals into the orchid petal shape, cutting the cane in half and combining to form a vaguely cane like shape around a small white core. Adding some tiny rolls of white clay in between the petal canes helps plugs the gaps. Then I trimmed the ends off so that all pieces were the same length. The final part of the process was to wrap the cane in a layer of white clay to keep it together. After some further rolling and reducing, you can see how it turned out.
Well, OK it's not how I imagined it, but at the same time, it's not a complete disaster. But seeing how this was built taught me a few things about caning. Firstly, the design wasn't properly defined. I kind of rushed into it, and built it on a wing and a prayer. So the point is that I didn't plan it very well to start with. I only had the petal canes I started with in the last post, and a few bits left over. As a result the cane wasn't nearly large enough to define the design and I should really have used more colours and layers to better define the borders between the petals, because it resulted in much of the colour being merged in the reduction process. Also the petals have sort of lost their shape at the ends and this is down to the layer of white clay around the edges. For one, the layer of white clay was too thick.
On the positive side you can still see the veining in the petals, but I think I will spend more time learning the basics of creating different pictures within canes before I move on further.
No comments:
Post a Comment